Below are 6 different sections of Nanoheal client UI,
1. Welcome Page
As you open the Nanoheal client, Welcome page will be displayed as shown in the below figure. There are multiple options on this page. You can click on the ‘Click to Troubleshoot’, button on the page to access the trouble-shooters page. You can also click on the burger menu on top to explore other functions. To come back to welcome page, at any time, click on home button on the top-left of the client to come back to this page. There are two images below- Welcome page with different options that can be explored by clicking on burger icon
- Troubleshooter page showing home button on top-left to navigate back to welcome page.

 Please see the button on top-left is context sensitive. It changes to back button when you travel more than one sections and you can trace the history back.
2. Troubleshooter’s Page
Troubleshooters page list all the automations that are available for end-user to execute. There are 2 ways to navigate to Troubleshooter’s page:- On the Welcome page, click on the “Click to Troubleshoot”, button to access the Troubleshooters page.
- From anywhere in the Nanoheal client, you can click on top right burger icon and click on the Troubleshooters option to open this page.

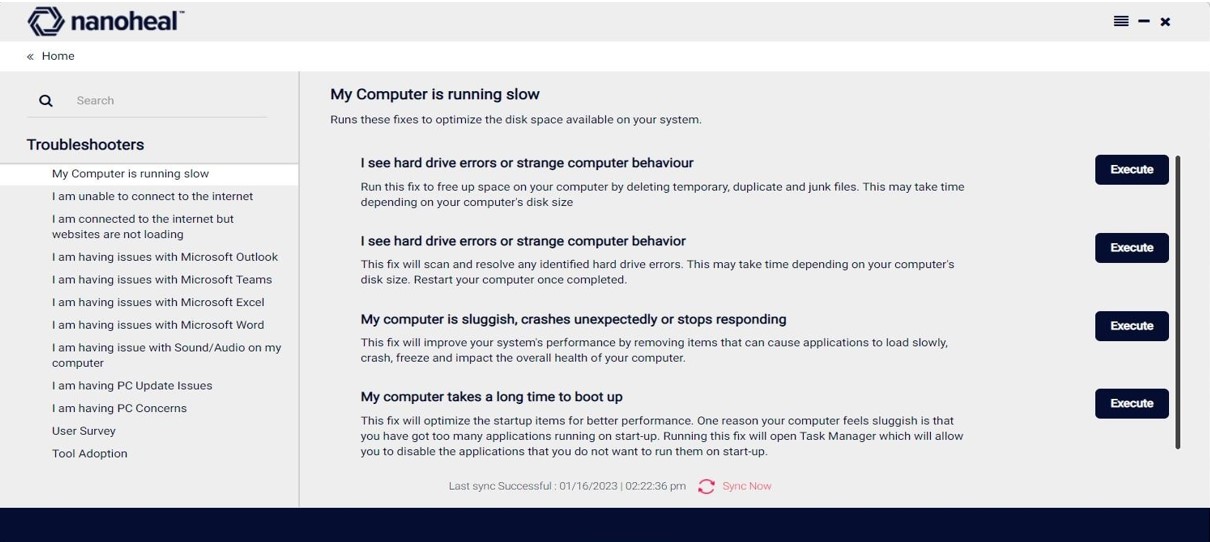
 On the left hand, it displays all the categories of automations that are available for end user to execute. User can navigate to relevant category and look for the required automations / troubleshooters. Click on one of the items from the list on the left to see the corresponding executable automations and tile descriptions. The automation / solution will be accompanied by “Execute” button. If the execute button is not displayed, then that would mean, it is sub-category and can further be expanded. Below 2 images show both type of pages:
- By clicking on a category on left hand panel, you see the automations / troubleshooters on the right side
- By clicking on a category on left hand panel, you see sub-categories on the right side. By clicking on the plus button in the sub-category, the automation list is opened up


3. Search function on Troubleshooter’s page
As the solution list can be long enough, there is a search function given on the left hand side. This can be used to search any particular automation. Search works efficiently to search for relevant search results within title and description. It can look for words in categories, sub-categories, automation title and automation descriptions. Below are the screenshots that explains few of the search scenarios:- Search for a key word and it filters the results on the left side of client
- Search for a phrase and it filters the results on the left side of client


4. Settings Page
The menu option in the upper right-hand corner can be used to navigate to the settings page on the client UI. This option is available from any section in the Nanoheal Client and displays the client version and site information.

5. System Information page
Another useful page is System Information. It displays basic system details, such as system configuration and the operating system. In case of any issues with the system, users can refer to this section to check the serial number when reporting problems to the helpdesk.

Hardware Information
The Hardware Information section will display the hardware information of the end-user device.
6. Service Logs Page
This section keeps a record of troubleshooters/automations run on a device. The default page displays a list of unique automations that have been executed, with the latest entry for each of them. There are different tabs that categorize the logs based on how the automation was executed: auto-heal, self-help, scheduled, and proactive.

History Details
The History Details section contains an entry each time an automation is executed.

